
Guide
How to make a tattoo stencil from a photo
Short answer: convert a sharp reference into black linework, remove the noise, add solid black only where the design needs it, clean up by hand, then print at 100% and confirm the size with a printed ruler before transfer.
- Choose a clear reference. Use a sharp, evenly lit photo or drawing with the subject filling the frame. A short edge of at least 700 pixels keeps lines smooth when the stencil is printed large.
- Pick a style. Start from a preset that matches the piece: fine line for delicate work, bold transfer for traditional pieces, portrait detail for faces, clean linework for flash and illustrations.
- Tune detail and shadow fill. Lower detail until skin texture and background noise disappear but the defining edges stay. Add shadow fill only where the design needs solid black.
- Clean up by hand. Erase stray marks and redraw any line the photo lost. A stylus on an iPad is the fastest way to do this at full size.
- Set the real size. Decide the width or height on skin with the client, in inches or centimetres, and keep the aspect ratio locked.
- Print at 100% and check the ruler. Print with scaling off, measure the printed calibration ruler, then transfer with your usual stencil paper or thermal printer.
Worked examples: a portrait and simple line art
Two real inputs and the Stencira engine's unedited output, with the exact settings used. A photo portrait needs more interior detail; clean line art only needs its existing lines kept crisp. Next step for both: erase the stray marks, then set the size.
Black-and-white photo portrait: Portrait Detail preset
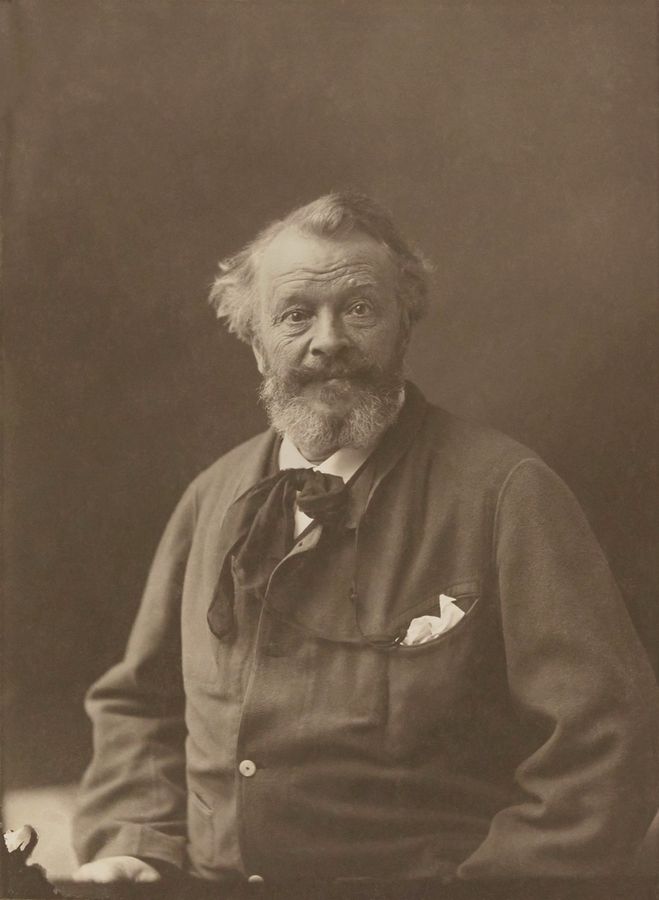
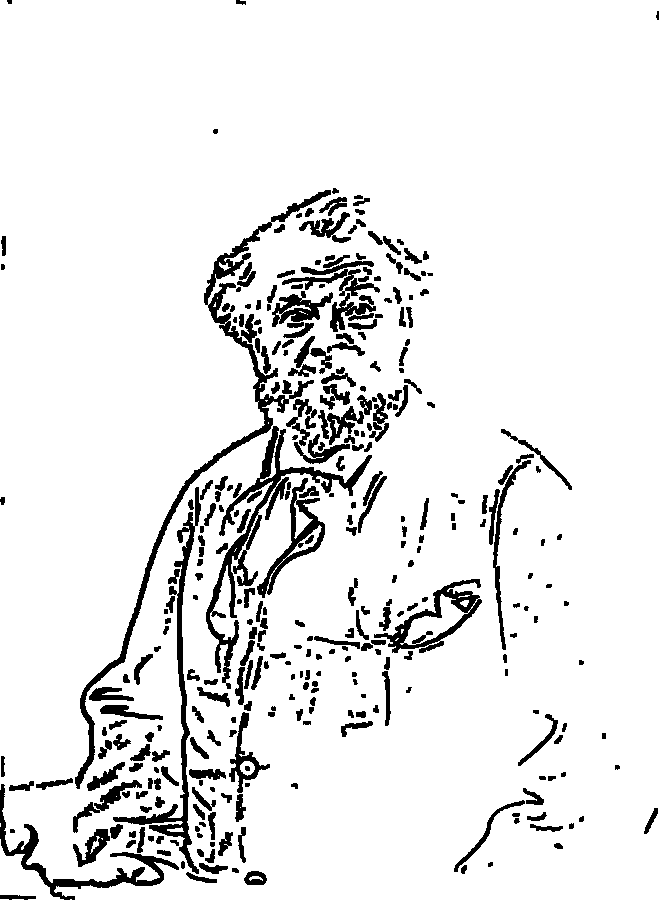
Settings: detail 75, contrast 60, noise cleanup 45, line weight 20, shadow fill 0. Rendered at 1025x1400 px by engine f8f6918. Source: Wikimedia Commons (Public domain).

Simple line art: Clean Linework preset
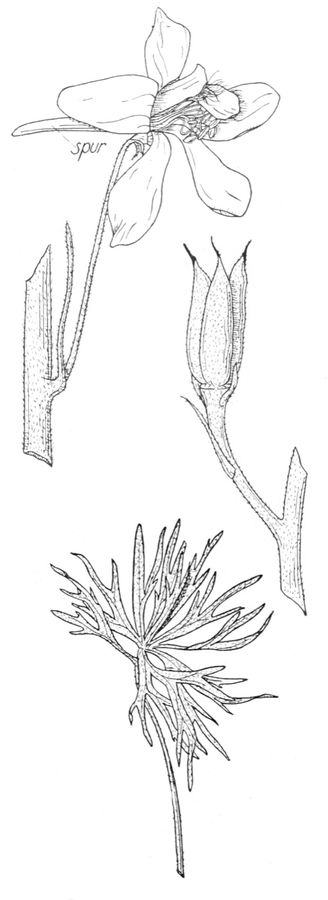
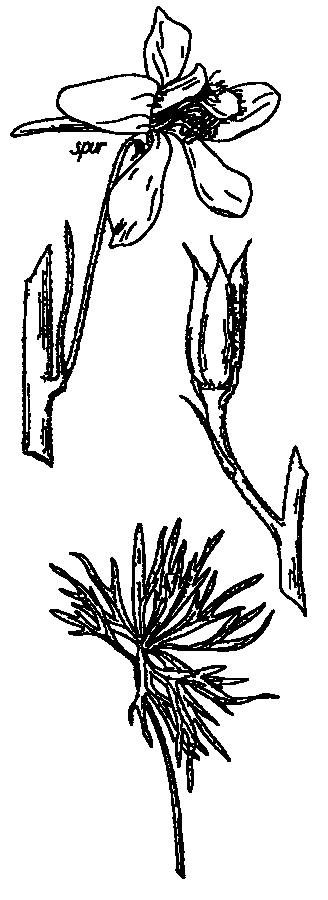
Settings: detail 35, contrast 75, noise cleanup 60, line weight 25, shadow fill 30. Rendered at 511x1400 px by engine f8f6918. Source: Wikimedia Commons (Public domain).

See all pairs on the examples page.
Choosing the right detail level
Too little detail loses the features that make the design recognisable; too much turns every pore and shadow edge into a line you will have to erase. Portraits usually need more detail than flash. A good test is to look at the stencil at arm's length: if you can still read the subject and there are no isolated specks, it is ready to clean up.
Mirroring for transfer
Whether a stencil needs to be mirrored depends on your transfer paper and printer, so follow the paper's instructions. Lettering is where a wrong mirror shows first — check any text before transfer. Stencira mirrors the whole print in one tap, including tiled pages.
Freehand vs printed stencils
Hand-traced stencils give you full control of every line. A printed stencil from a cleaned-up photo is faster and keeps proportions exact, which matters for portraits and for matching a size agreed with the client. Many artists combine both: print the base, then refine by hand.
Try the free stencil maker with the sample photo or your own image, compare the before and after examples, then read how to print a stencil at its actual size.